

How to Set Up Port Forwarding


DISCLAIMER: It is your responsibility to ensure that only authorized parties can access the IP and Port that you have set up. If you use port forwarding without any authentication on the local device, your device can be accessed by anyone on the Internet via a simple port scan. Windscribe does not take responsibility for any loss or damage incurred by having insufficient or no authentication on your internal service.
Port forwarding is commonly used for self-hosted services (Plex, NAS), peer-to-peer apps, and game consoles — especially for opening NAT on Xbox and PlayStation where a Strict NAT blocks party chat and matchmaking. To set up port forwarding, you will first need to purchase a Static or Residential IP from our website.
Once you've done that, there are two ways to configure port forwarding, either using a Windscribe client or through a manual configuration.
Set Up Port Forwarding Using the Windscribe App
Step 1
Once you've purchased the static IP, log into the Windscribe app and click the Static IP icon in the Locations tab to reveal your list of Static IPs: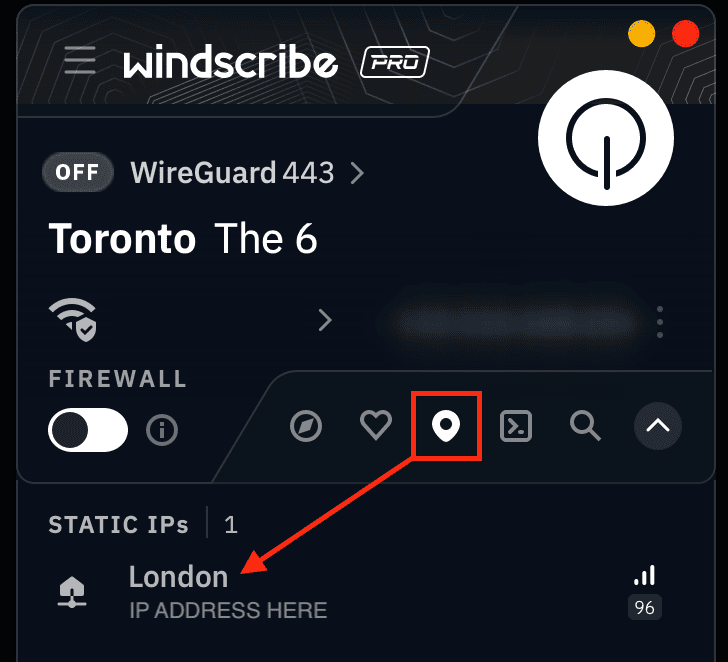
Step 2
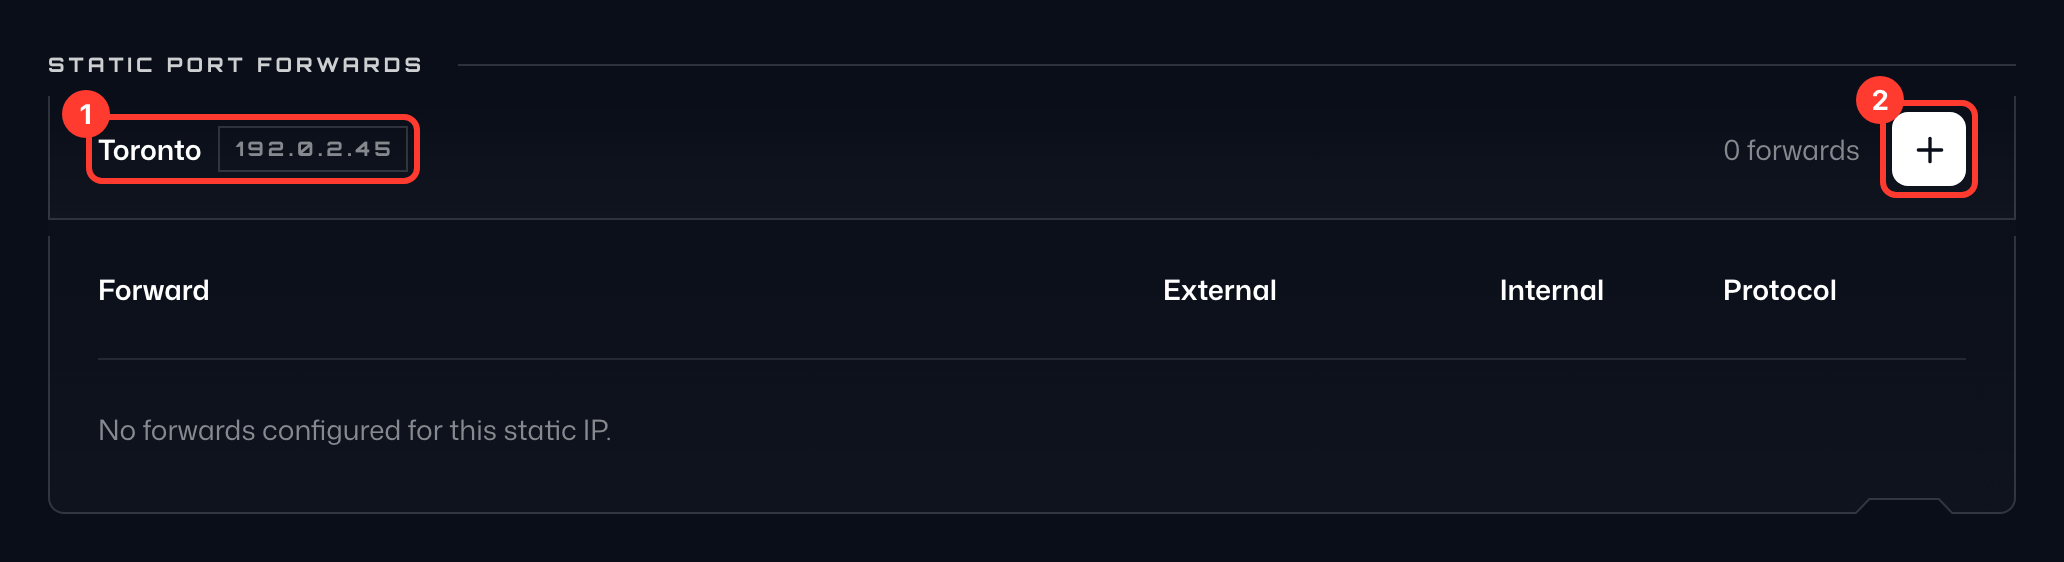
Open a browser window, log into the Windscribe website and go to the Port Forwarding tab of your account. In the Static Port Forwards card, you will see the same static IP server(s) (1) as you saw in the app.
Step 3
Press the + button (2) to the right of the server you intend to connect with to open the Add Port Forward form:
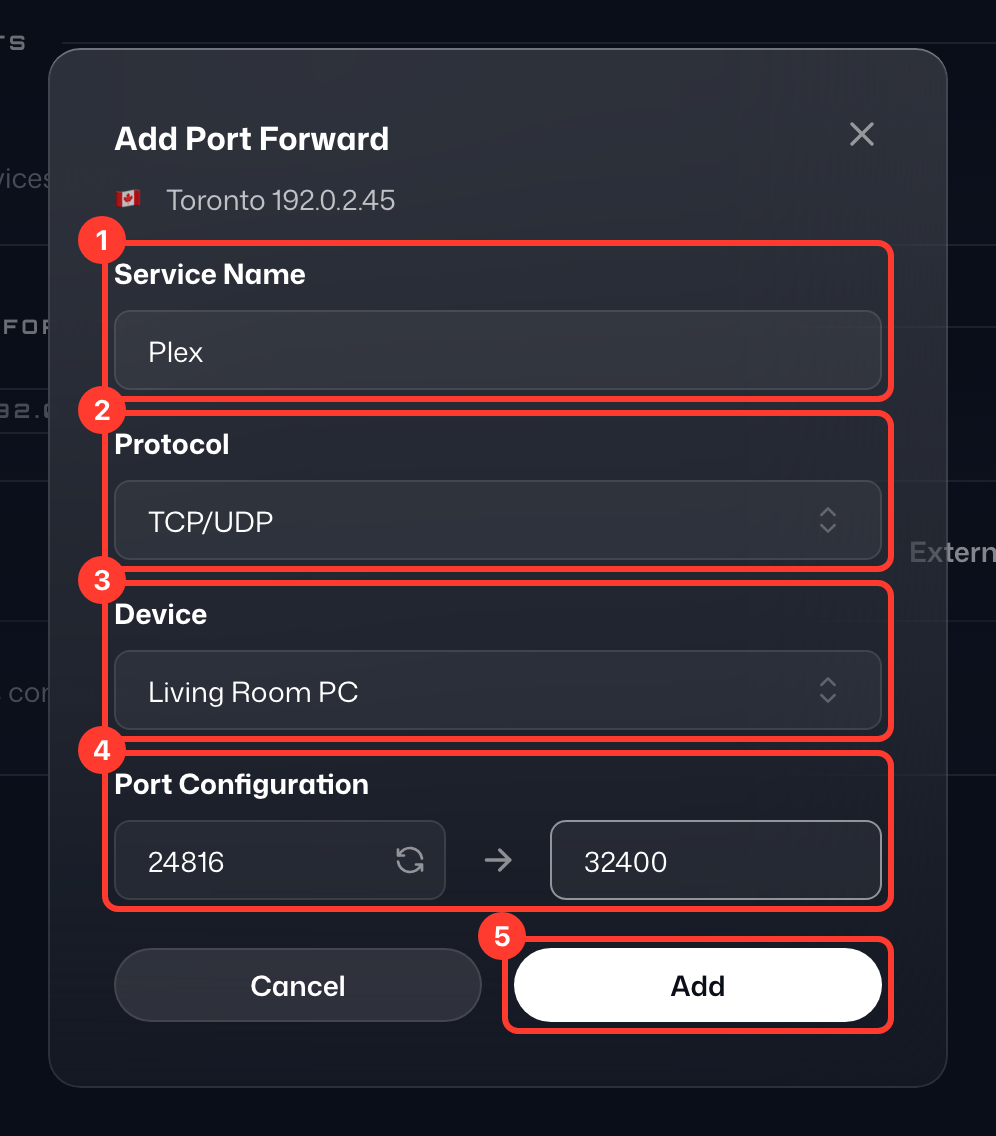
- Service Name (1) - This is simply a label for the configuration, set it to whatever you'd like.
- Protocol (2) - The protocol used for your port forward. Leave it as TCP/UDP if you're unsure.
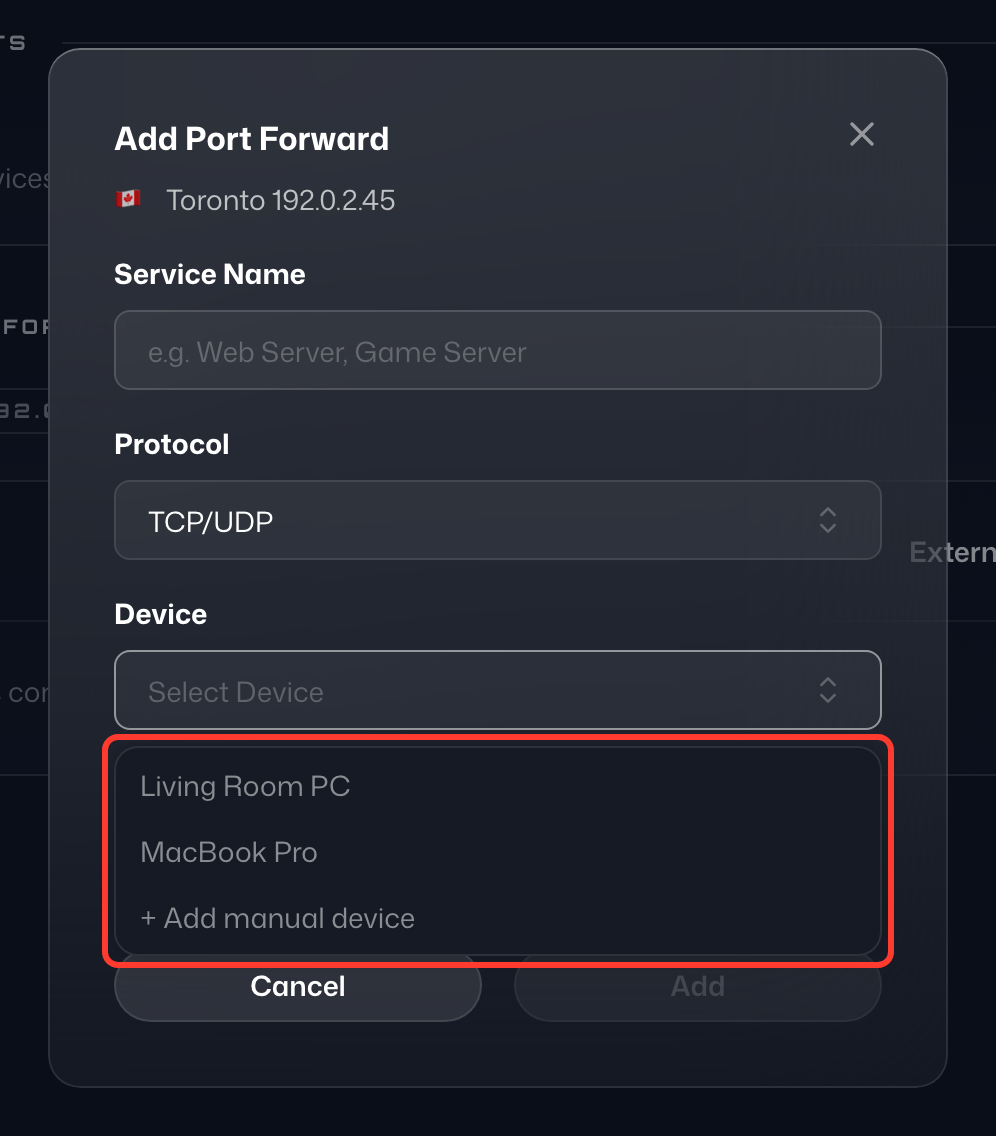
- Device (3) - All the devices that you can port forward to. Once you've logged into Windscribe on a device, it will appear in this list. You can rename devices under Devices › Manage on the Port Forwarding tab.
- External Port - The left box under Port Configuration (4): the public-facing VPN server port that you or anyone else will connect to. Pick any port between 1024 and 45000, or press the refresh button in the box to have an available one chosen for you.
- Internal Port - The right box under Port Configuration: the local port the application/service listens on. You should be able to access it via http://localhost:port (replace port with the actual port of the application).
Fill in the details with the settings you want to use and press Add (5).
Step 4
Ensure that the application/service port works without the VPN. Visit http://localhost:port in your browser and make sure the service actually works.
After testing without the VPN, open the Windscribe app and connect to the Static IP server you configured above. It is also a good idea to restart the service after connecting.
At this point, if everything is set up correctly and running, you should be able to access your device through the VPN server from any other device on the internet.
Here is what a completed port forward looks like: traffic that reaches the external port (1) on your static IP is forwarded to the internal port (2) on your device. To test it, open your static IP followed by the external port in a browser, for example http://192.0.2.45:24816.
This will not work on the device running Windscribe, as it creates a routing loop. Test from a different computer/phone.
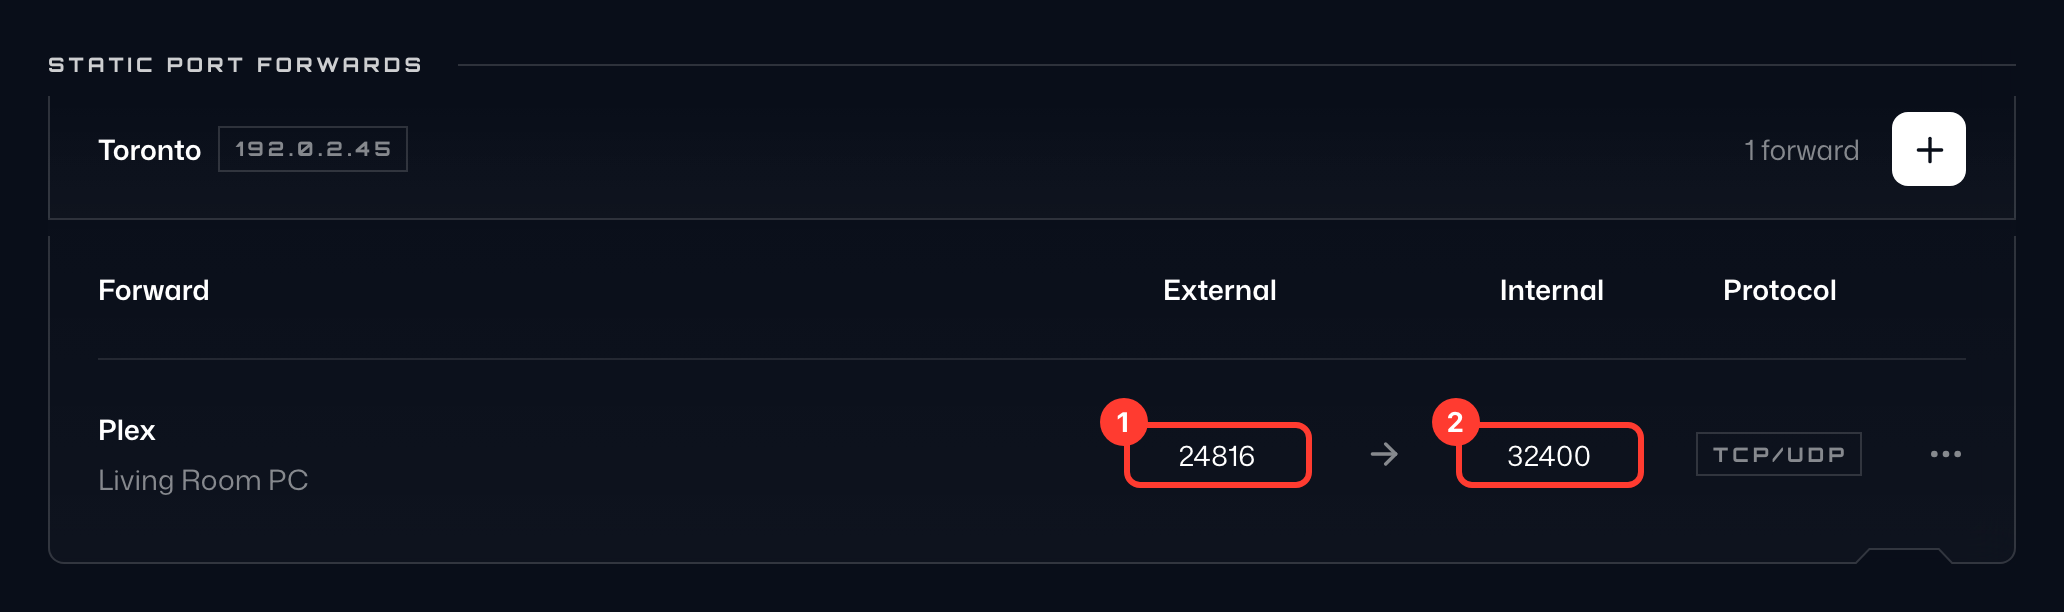
Keep in mind, this will only work if there is a web server running on the other end, such as the case with Plex, NAS, etc.
Setting Up Port Forwarding via a Manual Config
Step 1
Open a browser, log into the Windscribe website and go to the Port Forwarding tab of your account. In the Static Port Forwards card, you will see all of the static IP servers (1) that you purchased.
Step 2
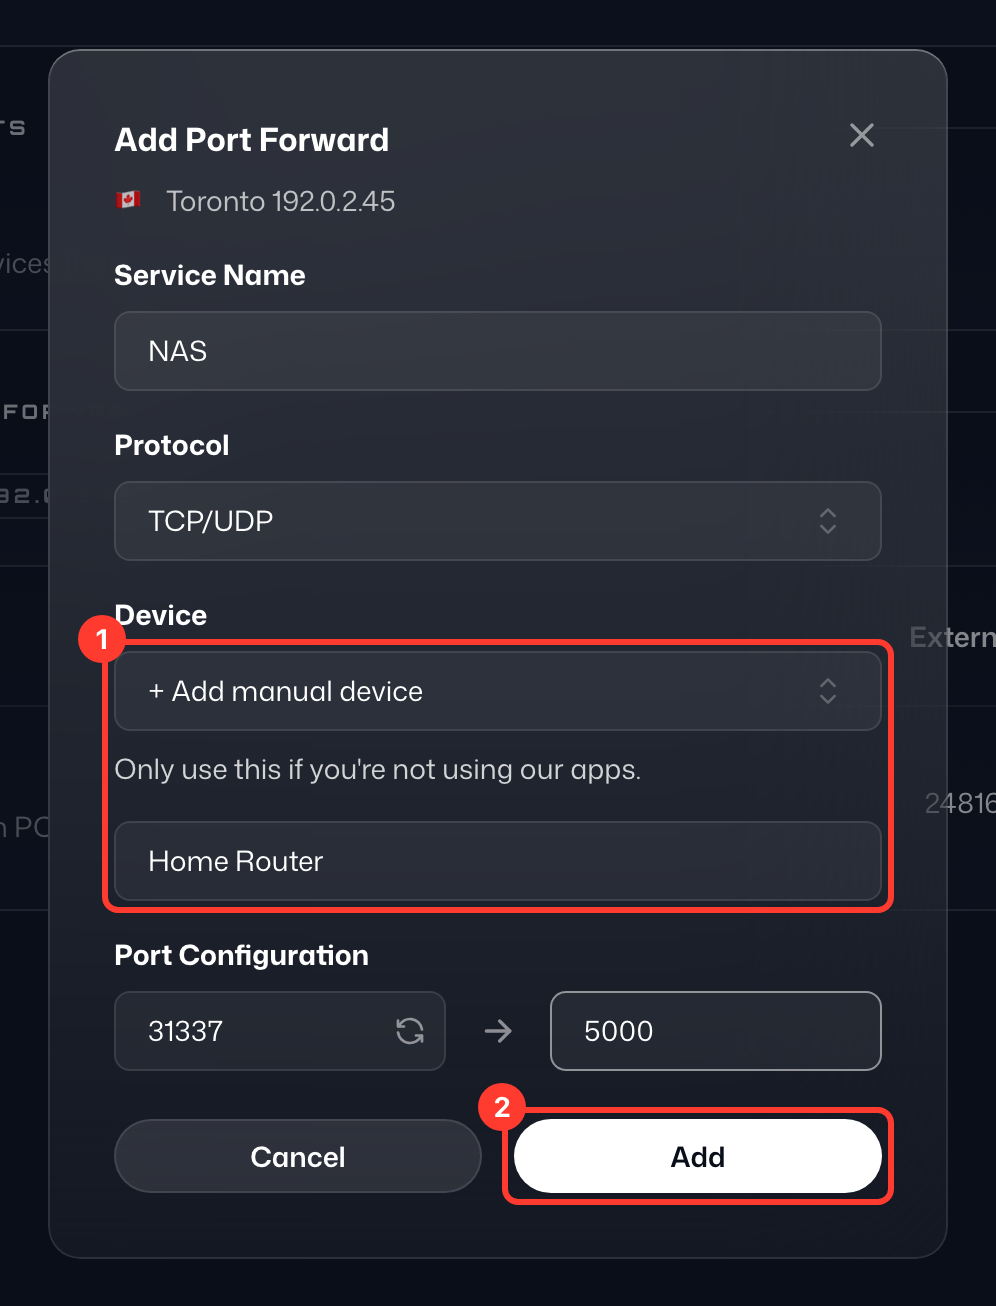
Press the + button (2) to the right of the server you intend to connect with to open the Add Port Forward form:
- Service Name - This is simply a label for the configuration, set it to whatever you'd like.
- Protocol - The protocol used for your port forward. Leave it as TCP/UDP if you're unsure.
- Device (1) - Select + Add manual device and enter a name for the device, for example your router.
- External Port - The left box under Port Configuration: the public-facing VPN server port that you or anyone else will connect to. Pick any port between 1024 and 45000, or press the refresh button in the box to have an available one chosen for you.
- Internal Port - The right box under Port Configuration: the local port the application/service listens on. You should be able to access it via http://localhost:port (replace port with the actual port of the application).
Fill in the details with the settings you want to use and press Add (2).
Step 3
Once you add the port forward, the New Device Added window shows the credentials for the new device (1). Click Download Config (2) to download the OpenVPN configuration file, and use these details in the OpenVPN settings on your device. (The config uses UDP on port 443, but if you want to change that, you can simply edit the .ovpn file in a text editor.)
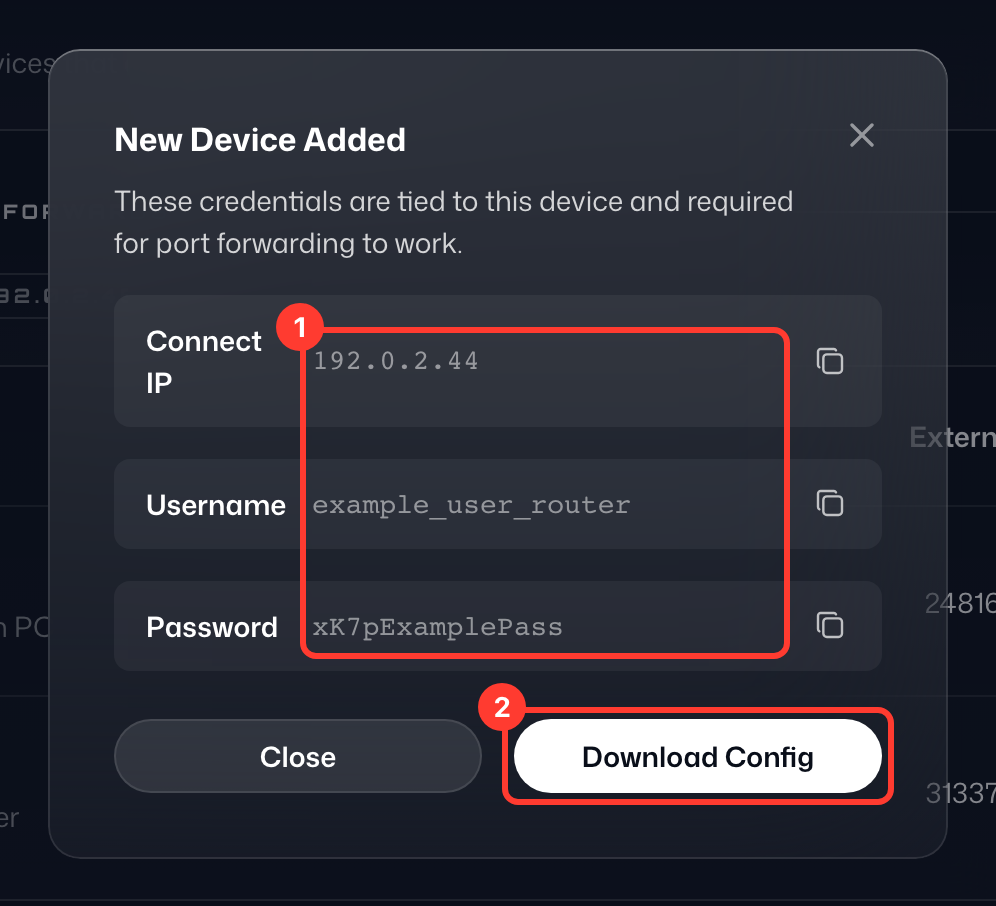
If you are following one of our setup guides to configure the OpenVPN connection, these are the credentials and .ovpn configs you want to use. You MUST use these details for port forwarding to work on that specific device.
Step 4
Ensure that the application/service port works without the VPN. Visit http://localhost:port in your browser and make sure everything is getting connected.
Once you've tested the port without the VPN, connect to the Windscribe Static IP server you configured the port forwarding on.
At this point, if everything is set up correctly and running, you should be able to access your device through the VPN server from any other device on the internet. Here is what a completed port forward looks like: traffic that reaches the external port (1) on your static IP is forwarded to the internal port (2) on your device. To test it, open your static IP followed by the external port in a browser, for example http://192.0.2.45:31337.
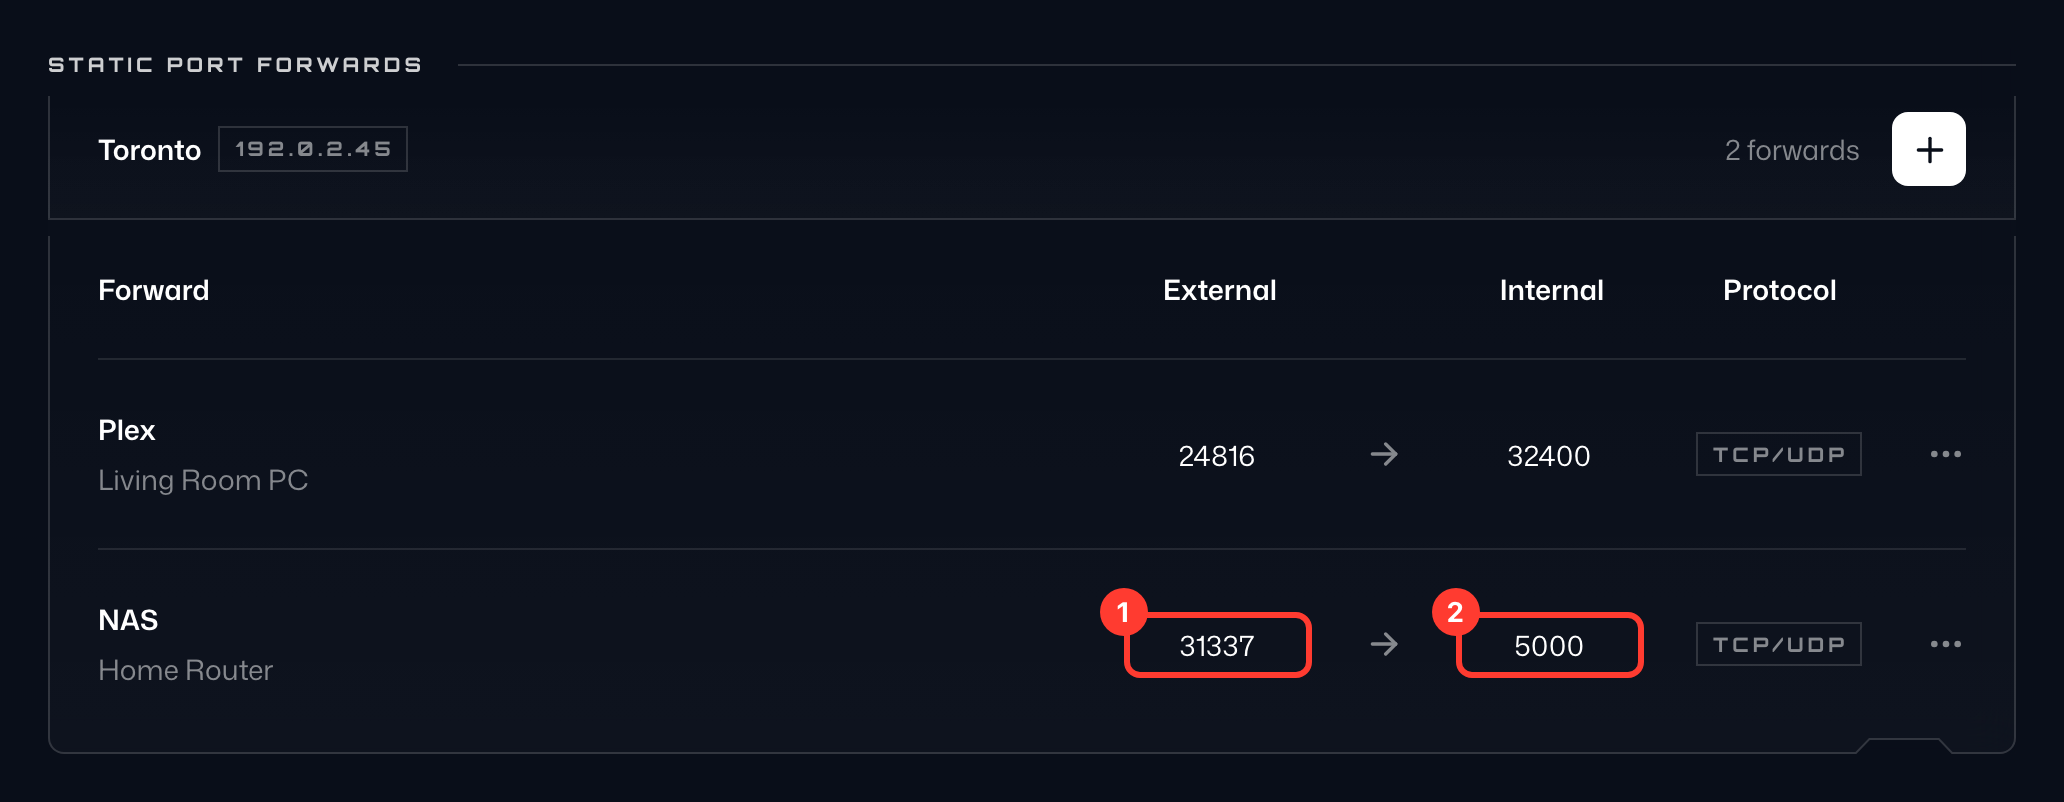
Keep in mind, this will only work if there is a web server running on the other end, such as the case with Plex, NAS, etc.
If you don't have a Static IP, you can still set up a port forward using our Ephemeral Port Forwarding option that comes included with the Pro plan. Find out how to do this here: https://windscribe.com/knowledge-base/articles/what-is-ephemeral-port-forwarding-and-how-to-use-it/
For more information on which of our locations support P2P, take a look at this article: https://windscribe.com/knowledge-base/articles/does-windscribe-allow-peer-to-peer-p2p-traffic/