
Windscribe
Apps
Company
© 2026 Windscribe Limited

Custom DNS is a feature that allows users to take advantage of a selection of third party DNS services while connected to the Windscribe VPN. Here is how to enable this feature:
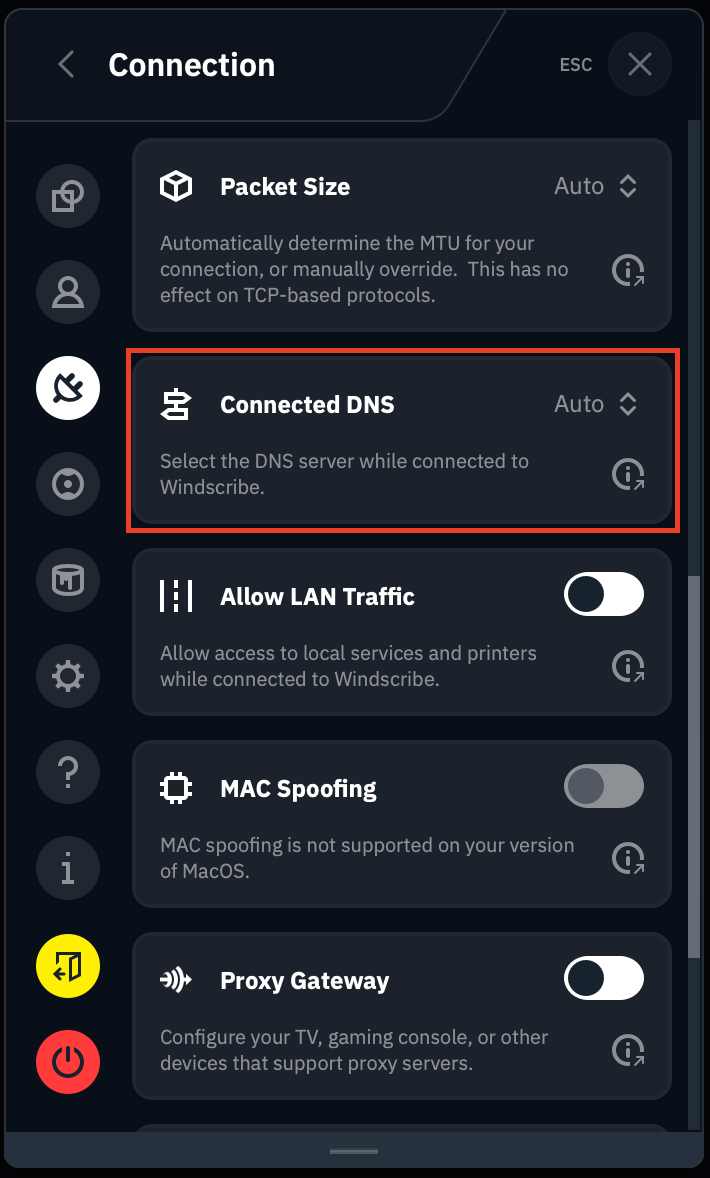
In the Windscribe Desktop application, head to Preferences >> Connection (plug icon) and scroll down to the Connected DNS box:
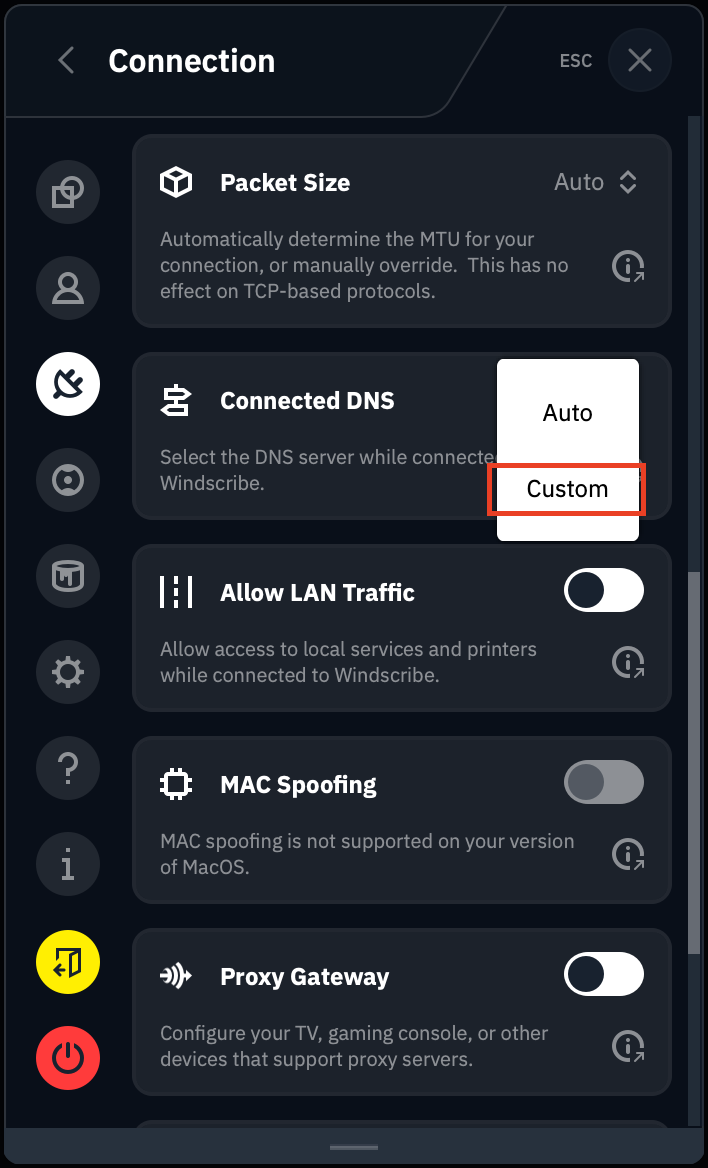
Select Custom from the dropdown menu:
Now you will have the option to enter the IP for the DNS resolver you'd like to use. In addition to legacy (IPv4) DNS resolvers, we have also added the ability to tunnel your DNS queries over DoH (DNS over HTTPS) or DoT (DNS over TLS) resolvers.
Legacy DNS
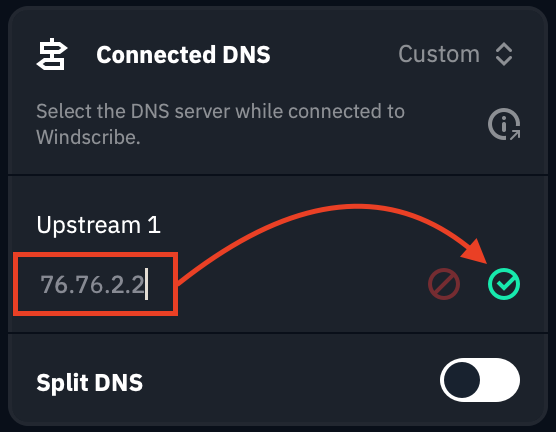
In the box marked Upstream 1, enter the legacy DNS you would like to use. This will override the default DNS server assigned by the VPN.
In this example, we've selected 76.76.2.2, which is our sister service Control D's 'Ads & Trackers' Free DNS. Once you've added your DNS, click the green check mark to activate it:
Secure DNS
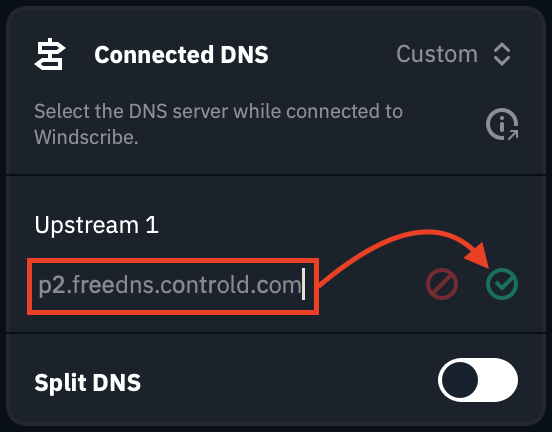
If you wanted to use Control D's secure DNS over TLS (DoT), you would simply enter p2.freedns.controld.com in the field, and click the green check mark to activate it:
If you need/want to make changes, simply click the pencil icon: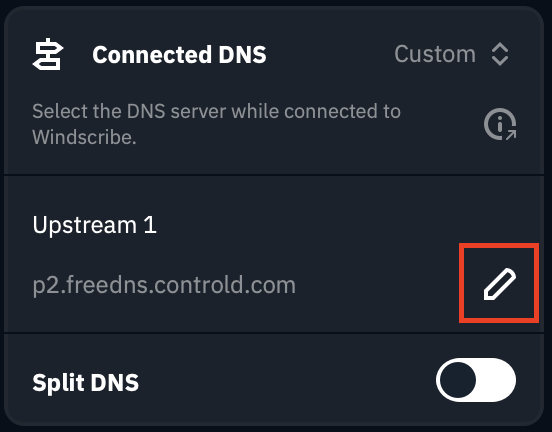
Now you can return to the main screen of the desktop client and connect to a location of your choosing.
After you have connected, open a Command Prompt (Windows) or Terminal (Linux or MacOS) and run an nslookup test against any domain to confirm your custom DNS is working. A DNS leak test will also yield this result.
NOTE: Keep in mind that when using the custom DNS, your R.O.B.E.R.T. settings will not be applied as R.O.B.E.R.T. is Windscribe's DNS. If you want to use R.O.B.E.R.T., return to Auto mode in the settings above, and reconnect to the VPN.
Split DNS
We've also added a split DNS option, which allows you to use a different DNS server for specific domain names. This can be useful if you want specific domain names to resolve using a different DNS server you trust.
You can enable this by toggling the Split DNS switch to ON (green):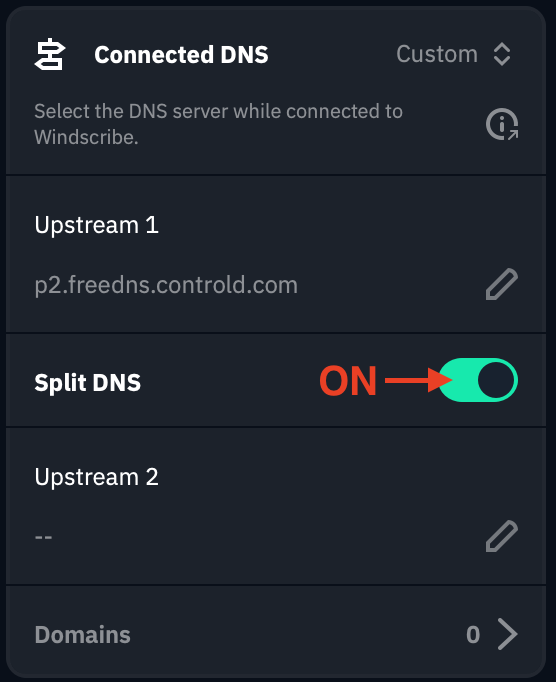
In the box marked Upstream 2, you can now enter the second DNS option you'd like to use, and click the green check mark to activate it. In this example, we used Control D's 'Unfiltered' Free DNS:
To add the specific domain(s) you'd like this secondary DNS to resolve, click the Domains tab at the bottom of the box: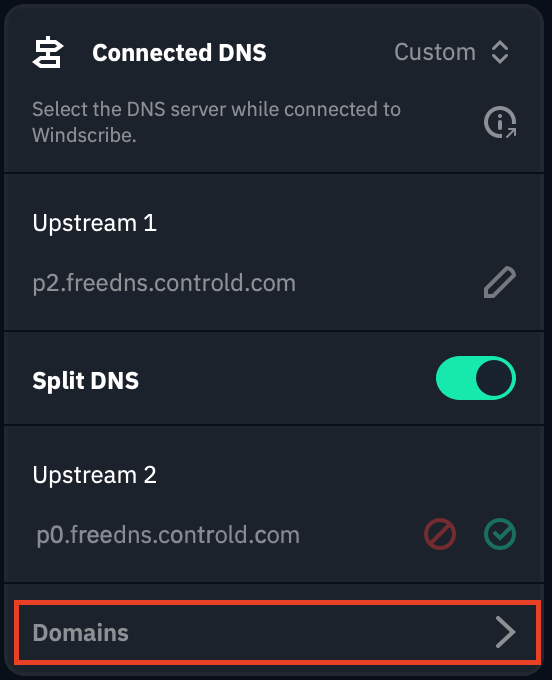
Enter the domain you want covered, and click the + icon to the right. Repeat this step with each domain you'd like added:
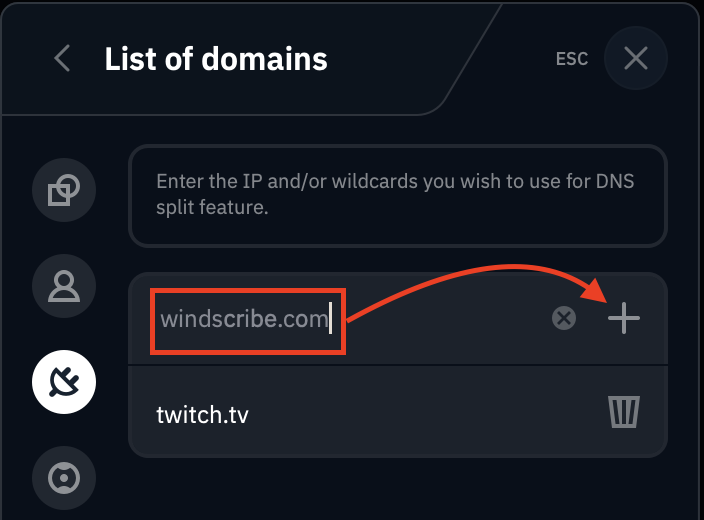
You can remove domains from the list by clicking the trash bin icon to the right of the domain.
For more information on Windscribe's DNS features, check out our DNS explainer video: